NetSuite
To connect and share data from your Oracle NetSuite account you will need to obtain 5 pieces of information:
Account ID
Consumer Key
Consumer Secret
Token ID
Token Secret
Step 1: In NetSuite, Your NetSuite Account ID
You can find your NetSuite account ID at the beginning of the NetSuite URL. For example, if the URL is https://1234567.app.netsuite.com/, your account ID is 1234567. You can also find the Account ID by logging in to NetSuite as an administrator, and select Setup > Integration > Web Services Preferences > Account ID.
Step 2: In NetSuite, Enable NetSuite Web Services
To enable the NetSuite Web Services feature
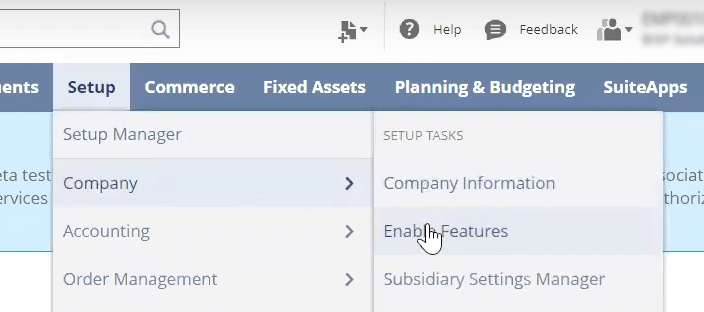
Enable features in NetSuite
Log in to NetSuite as an administrator.
Select Setup > Company > Enable Features.
Select the SuiteCloud tab.
Ensure that the SuiteTalk (Web Services) check boxes are selected (Both SOAP and REST).
Ensure the Token Based Authentication check box is enabled under the Manage Authentication heading.
Select Save.
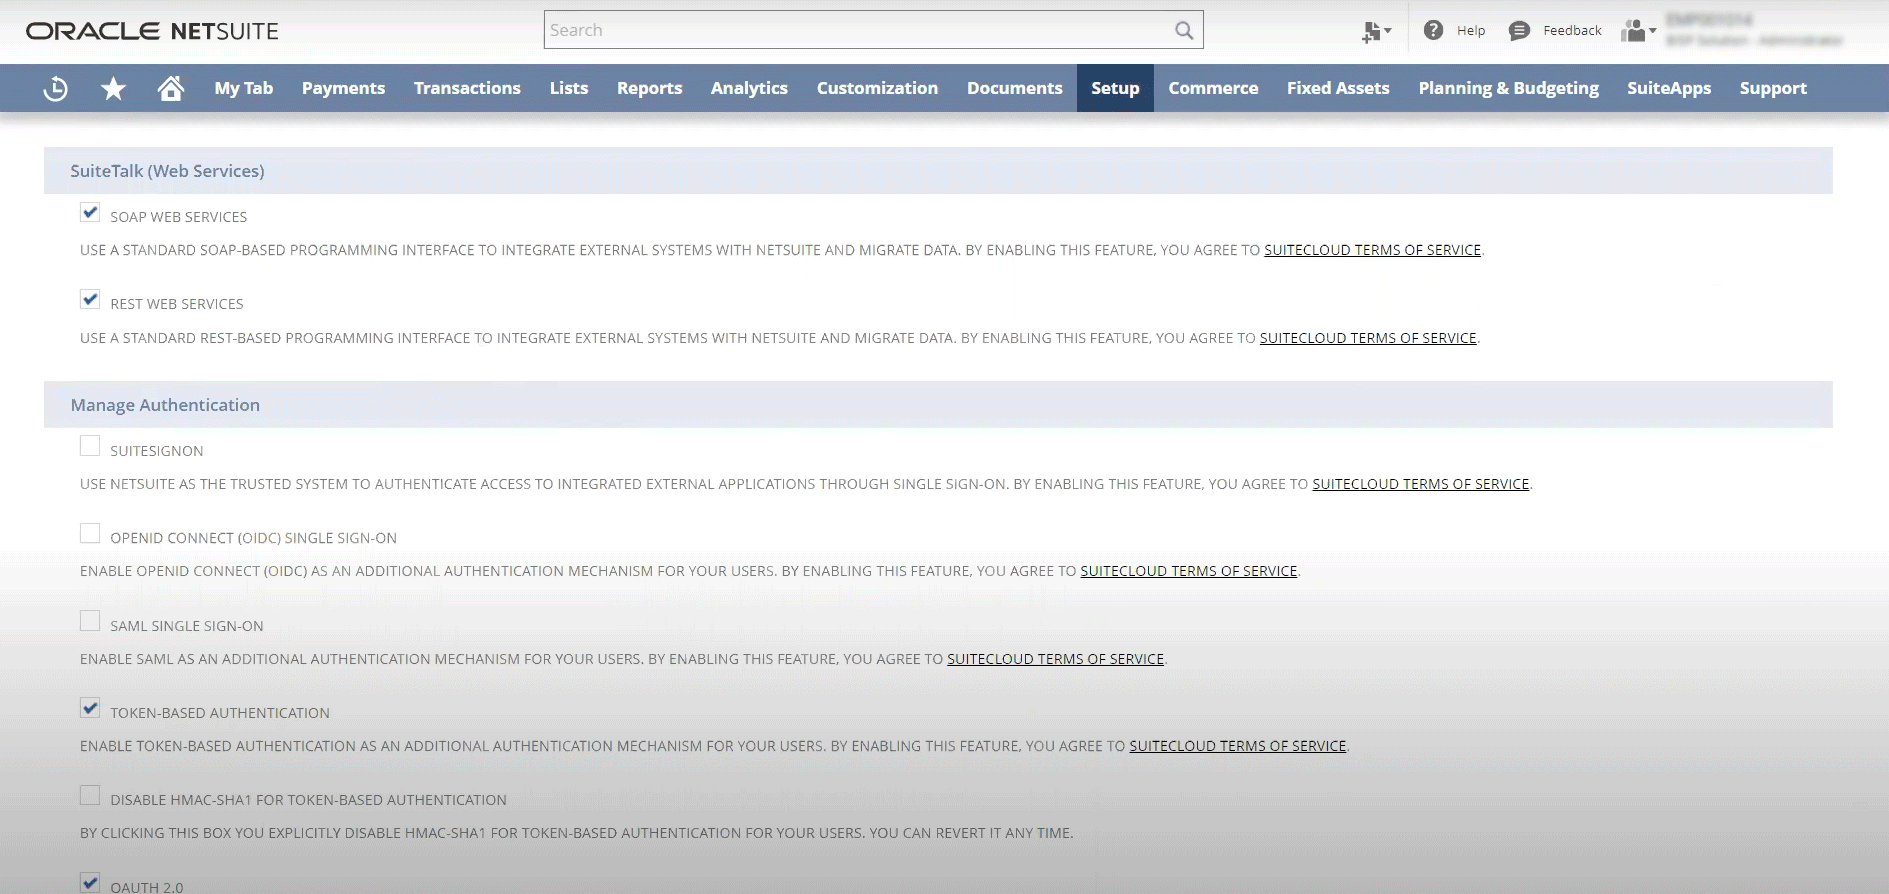
Web Services and Token Based Authentication enabled
Step 3: In NetSuite, Create an integration
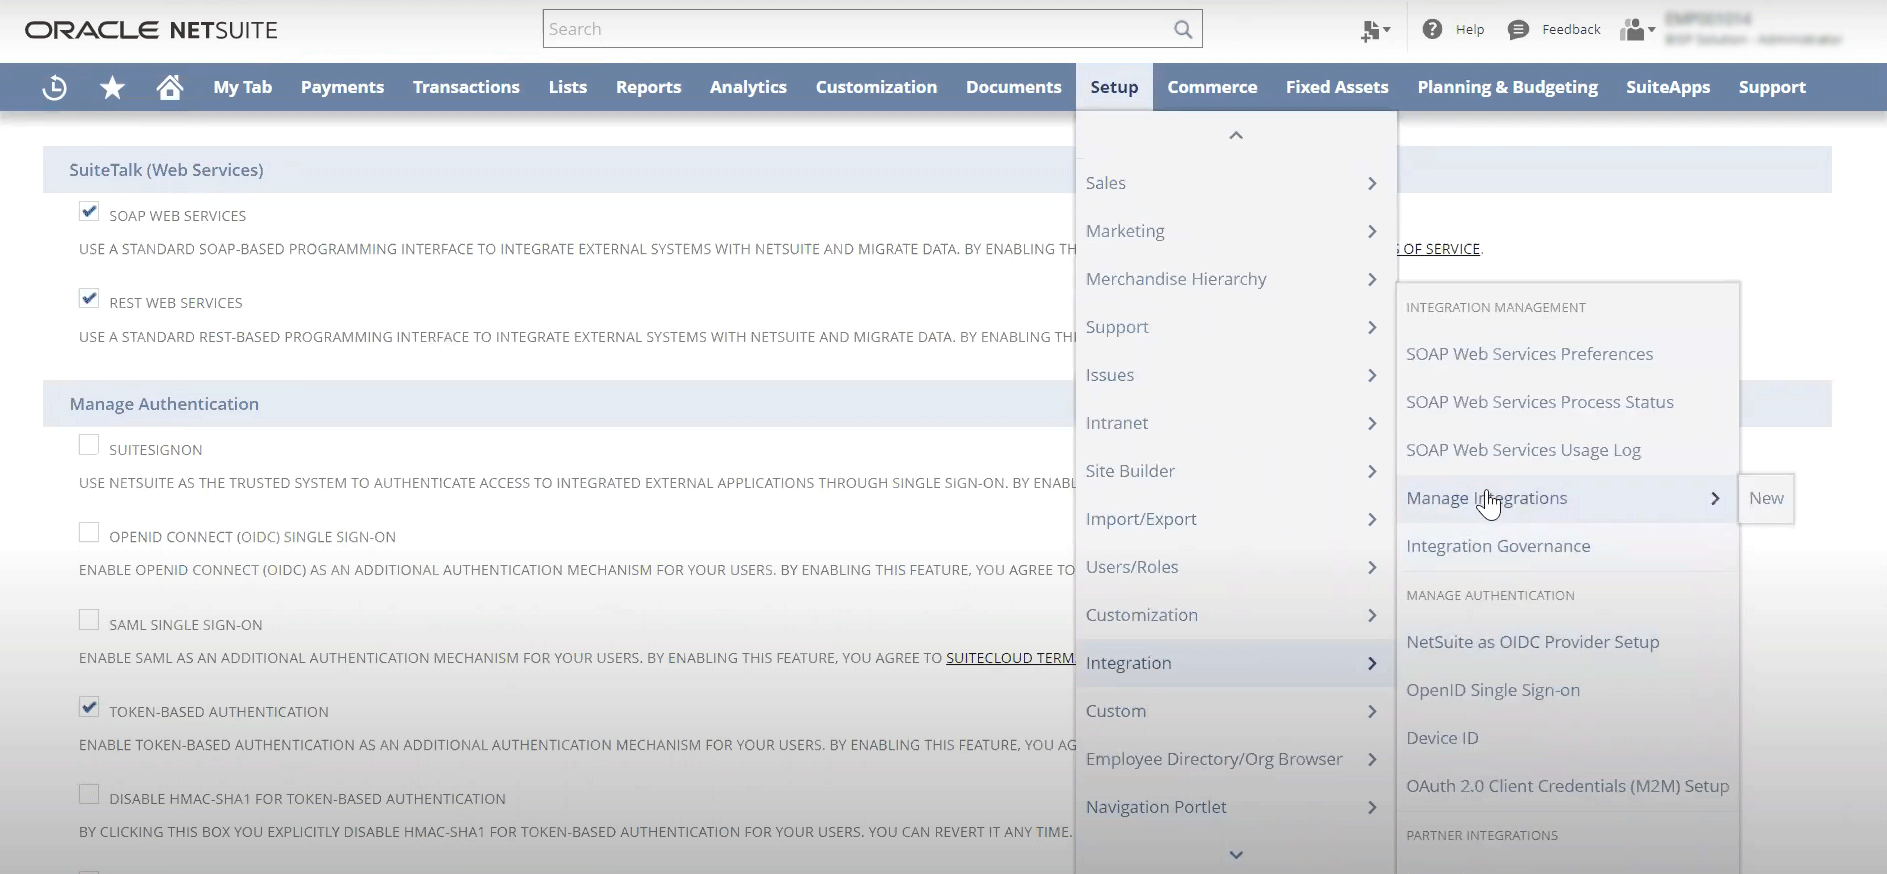
Creating a new integration
Log in to NetSuite as an administrator.
Select Setup > Integration > Manage Integrations > New
Give the integration a meaningful name and ensure the following:
Token based authentication is checked
TBA: Authorization Flow is not checked
Authorization Code Grant is not checked
Select Save.
Under the Client Credentials heading of the newly created integration a Consumer Key and Consumer Secret will be displayed, copy these two values as they will only be shown once.
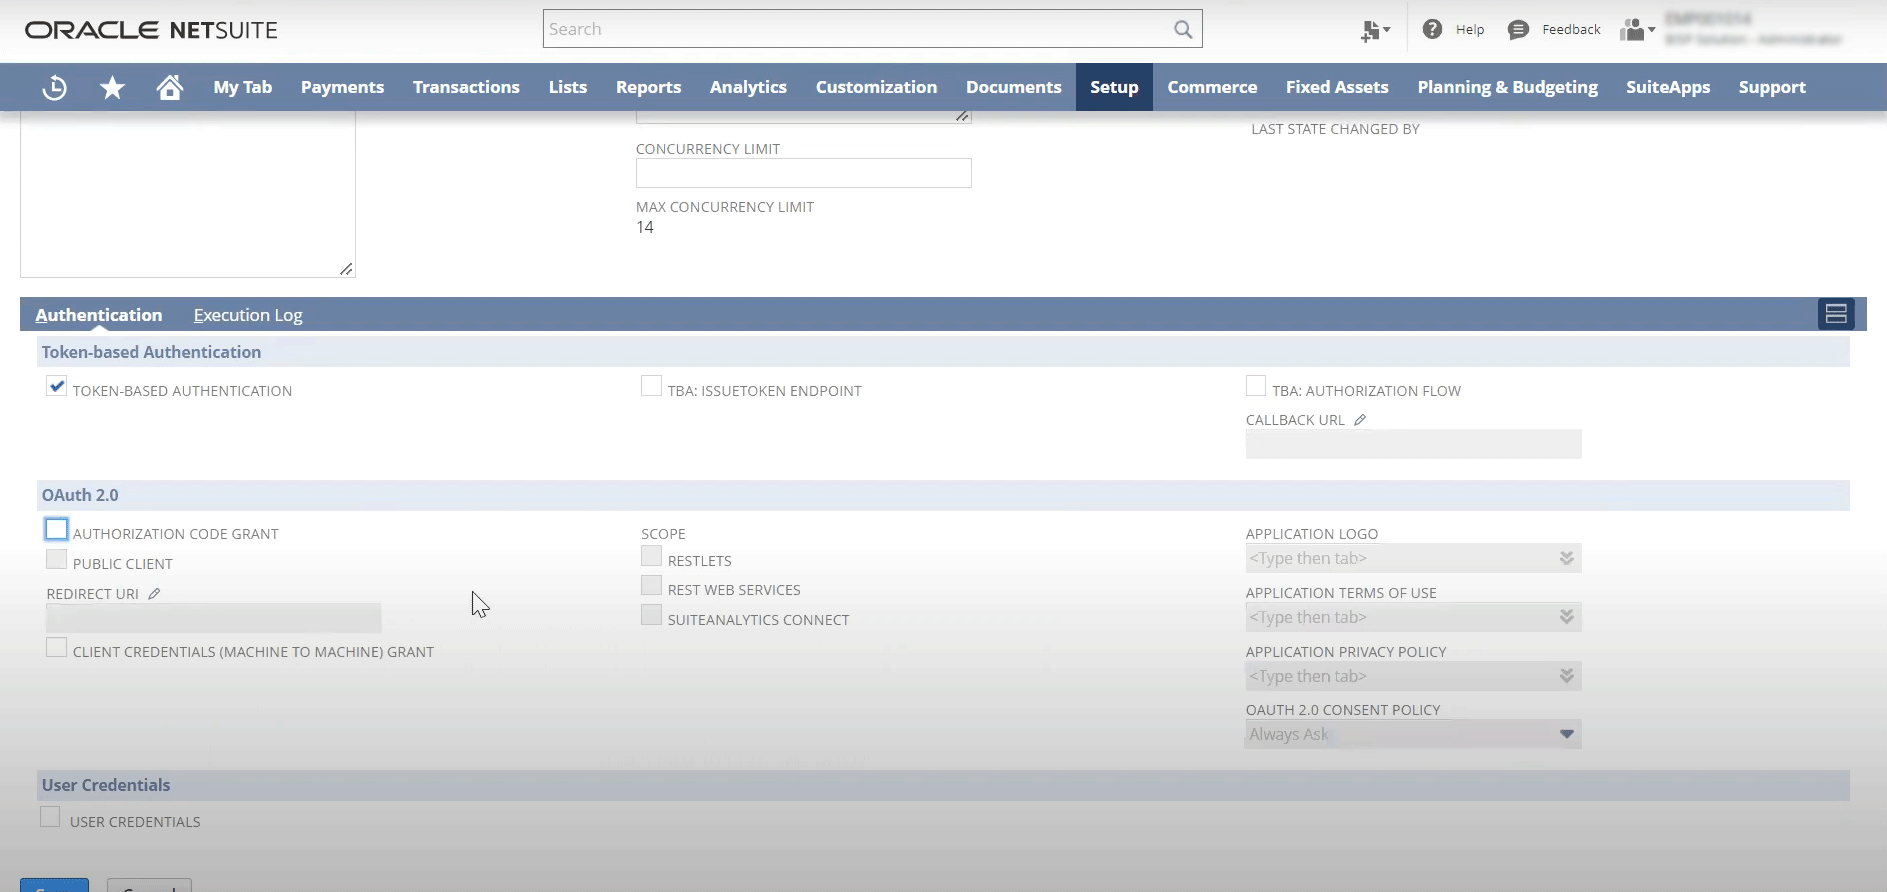
Ensure Token Based Authentication is checked
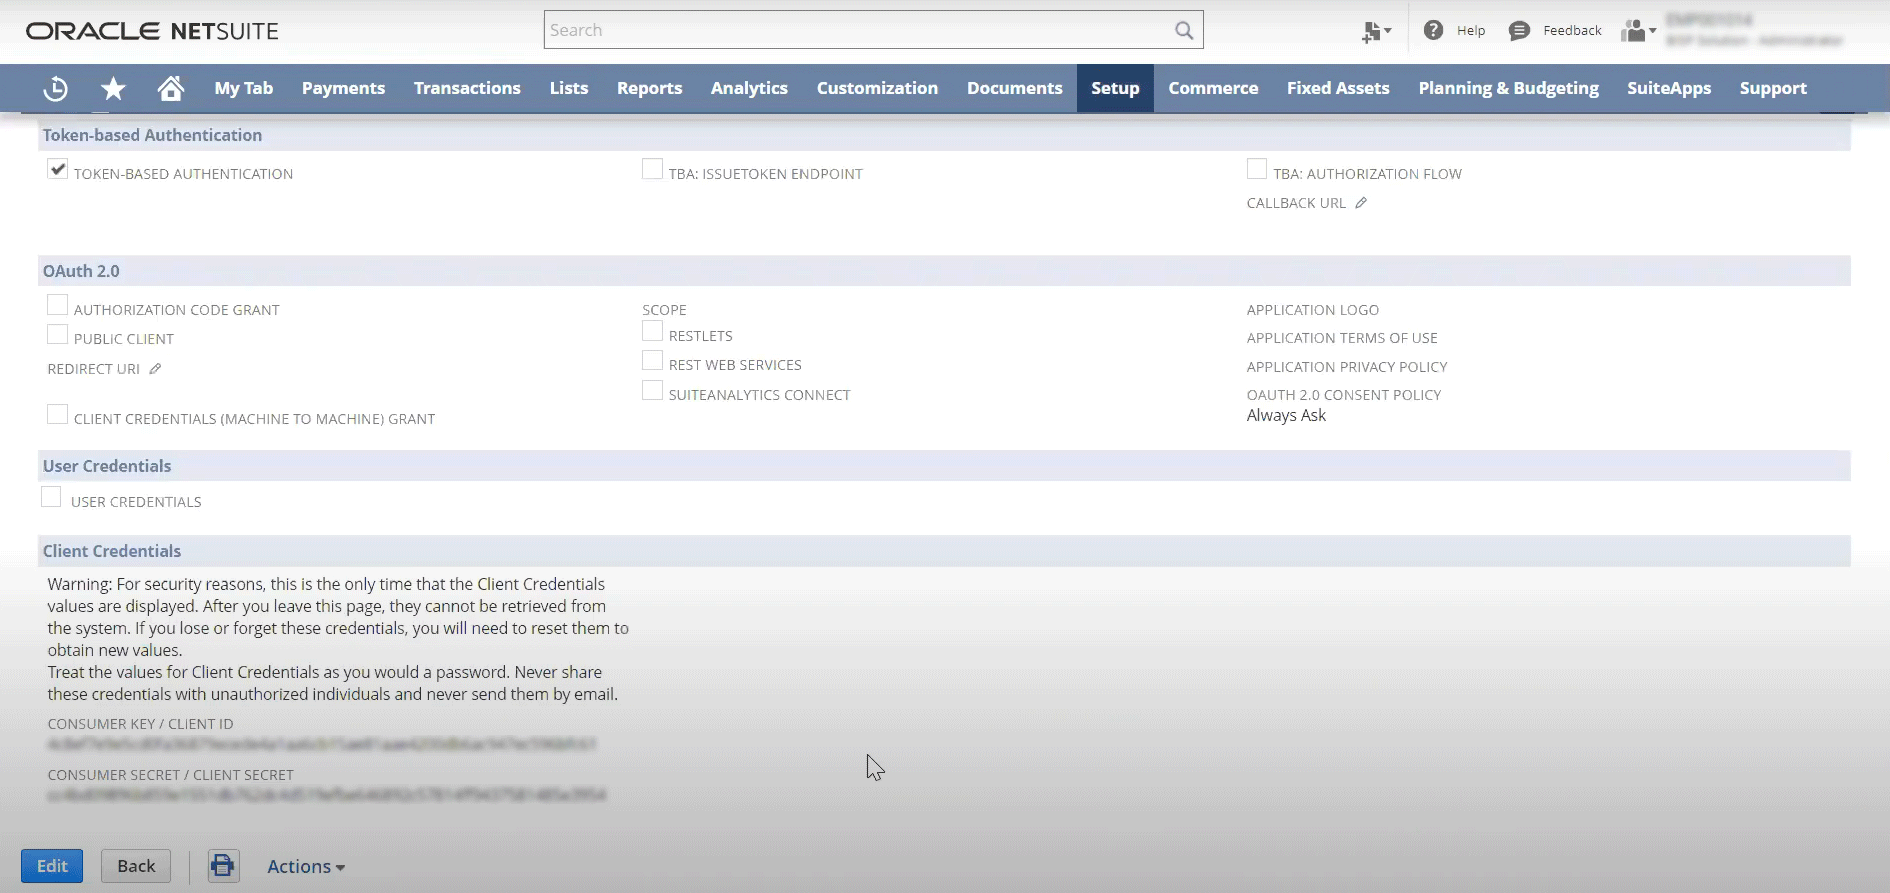
Client credentials are only shown once
The Token ID and Token Secret are displayed only once. After you leave the NetSuite page that displays them, they can never be retrieved from NetSuite. Store the values in a very safe place, and treat them as securely as passwords.
Step 4: In NetSuite, Create an access token
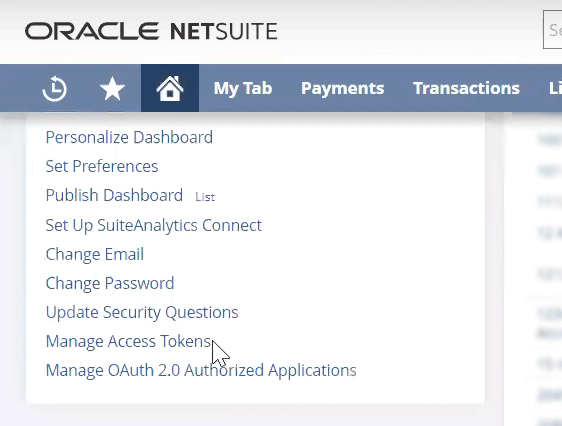
Managing access tokens

Creating a new access token
Log in to NetSuite as an administrator.
Select Home/Dashboard and then choose Manage Access Tokens
From the Manage Access Tokens page choose New My Access Token
From the Access Token page set the Application Name to that of the integration you created in the earlier step and provide a meaningful name in the Token Name field
Select Save
Under the Token Id / secret heading of the newly created access token a Token Id and Token Secret will be displayed, copy these two values as they will only be shown once.

Select the integration application created earlier
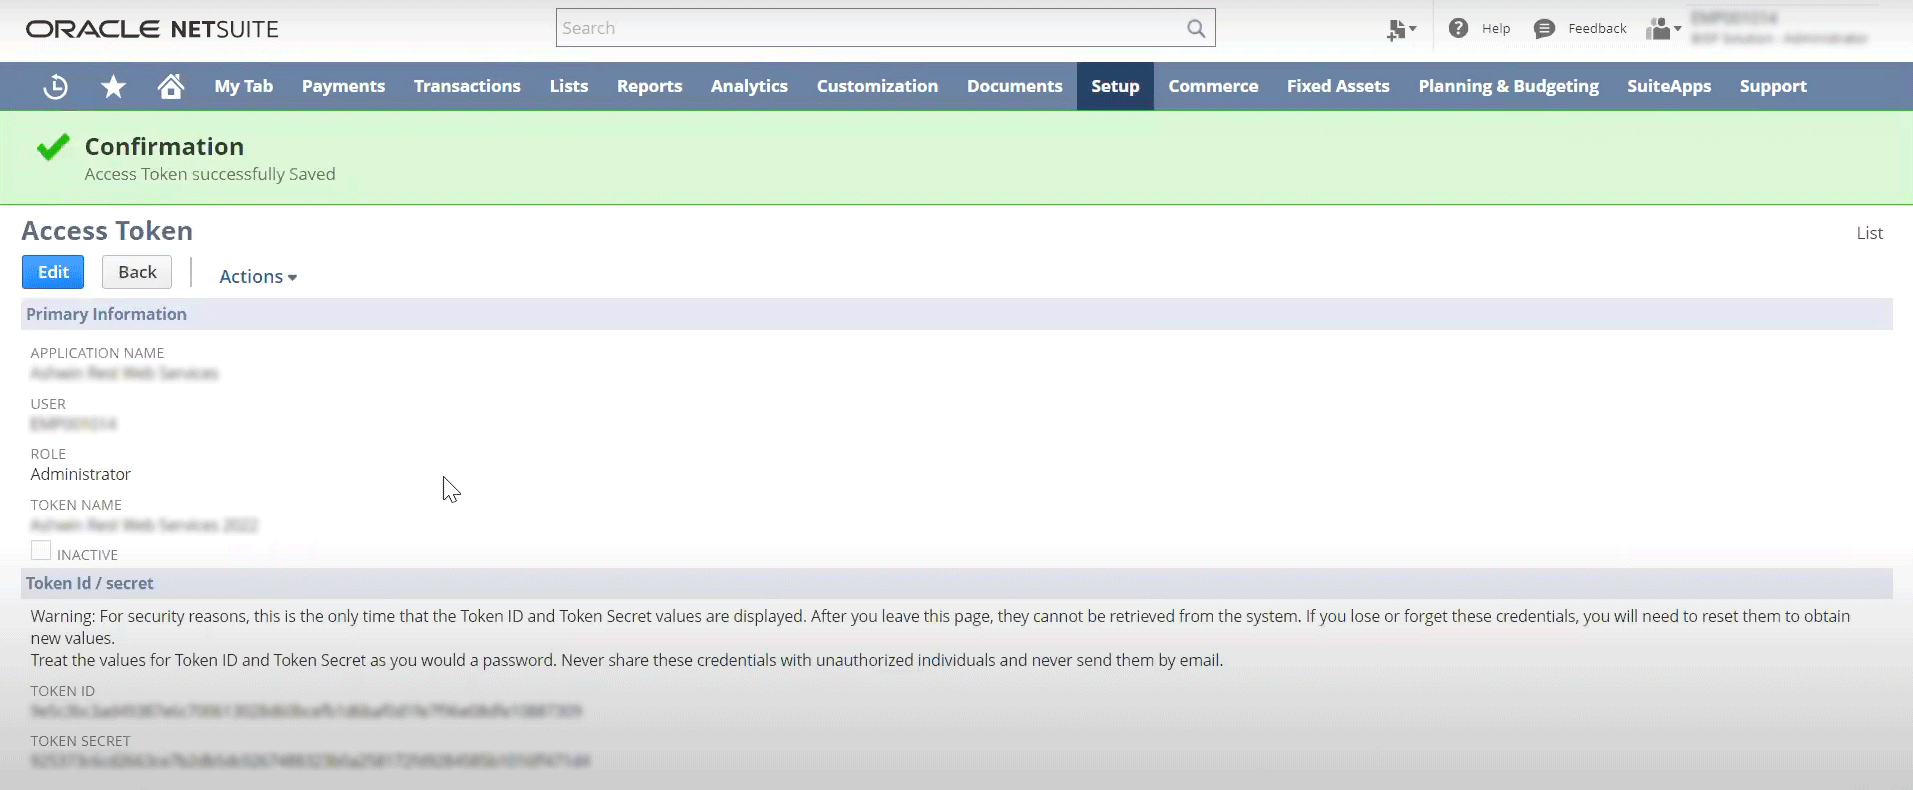
Access token and secret is shown once
The Token ID and Token Secret are displayed only once. After you leave the NetSuite page that displays them, they can never be retrieved from NetSuite. Store the values in a very safe place, and treat them as securely as passwords.
Step 4: Connecting, Enter connection information
You will need to enter the following fields which you should have values for from performing the previous steps:
Account ID
Consumer Key
Consumer Secret
Token ID
Token Secret
